PART G
Materials
- PLA filament
- Nylon floss and bristles
- Aluminum floss cutter
- Glue/ adhesive
- Logo Sticker
- Nylon floss and bristles
- Aluminum floss cutter
- Glue/ adhesive
- Logo Sticker
Tools
- Inventor
- 3D printer
- Super glue
- Plyers
- Scissors
- 3D printer
- Super glue
- Plyers
- Scissors
Additional Documentation
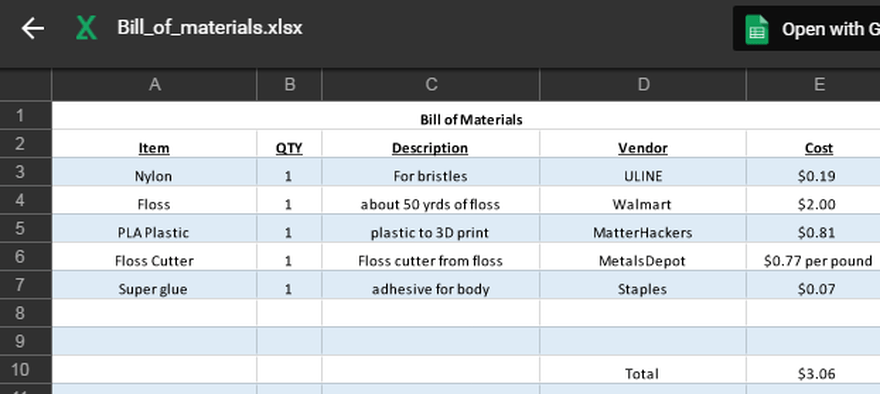
Building Procedures and Pricing
1. Design body, head, cap, and spool on Inventor. Make sure clearance is on each hole and peg, measure to the average size of a toothbrush, but with room from a long floss spool.
2. Print design using 3D printer. Wash parts after printing.
3. Assemble parts (excluding cap) and put spool of floss inside the handle.
4. Glue reused bristles into holes on head. For this, we used the super glue, plyers, and scissors to take the bristles from a school provided toothbrush to move them to ours.
5. Super glue floss cutter onto bottom of handle (side without hole). Floss cutter is taken from the floss package.